
SAFETY NOTES: Contact with chlorine, bromine, and/or iodine will cause burns and stains. They are toxic. Use the small amounts as directed. Make sure ventilation is adequate; work under a hood if it is not. Wash hands frequently during and after the experiment to avoid ingesting these substance. If contact with these substances occurs, wash hands thoroughly and then tell the teacher.
GENERAL INSTRUCTIONS: You will be working on your own today. You will need to exchange your results with one other student in order to report results for both the sodium and potassium salts. At least 12 clean test tubes will be needed for todays experiment.
Part I: Solubility Testing of the Halides |
|
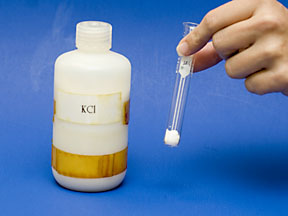 |
This portion of the experiment tests the solubility of the halides. Two sets of halide salts are available, sodium salts (Na+) and potassium salts (K+). Choose one of the sets. Get together with another student who will test the other set to share data. Add a small amount (the size of a small pea) of the solid chloride salt to a test tube. Note the appearance and other properties in your notebook. |
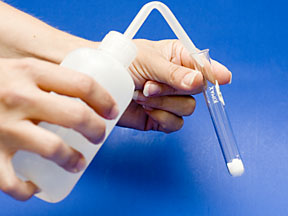 |
Now add 2 mL of distilled water and agitate the test tube. Record your observations. Repeat for each of the other solid halide salts in the set. |
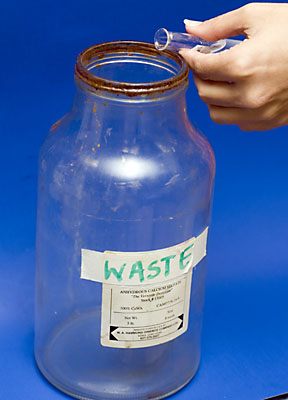 |
Repeat steps 1 and 2 using hexane as the solvent instead of water. NOTE: Any solution that contains hexane should be disposed of in the waste jar under the hood. |
Part II: Solubility Testing of the Halogens |
|
 |
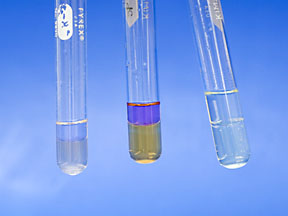
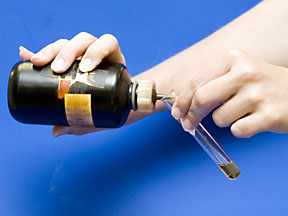
The solubility of the halogens will be tested next. NOTE: If you are not good at describing subtle differences in colors, you may use the crayons provided to make accurate color notes on the two layers of the test tubes for the remaining tests. Simply draw a diagram of the test tube In your notebook and match the color of the experimental layers using the crayons. Remember, sometimes a picture is worth a thousand words. Add 1 mL of the aqueous (water) solution of iodine (I2) to a test tube. Iodine is a solid at room temperature. Can you hear the solid crystals rattling in the bottom of the dropper bottle? Do not measure the amount in a graduated cylinder. An approximate amount is good enough, and 20 drops is roughly 1mL. Be careful not to spill any of the halogen solutions on your skin or clothes, as it will stain. Record the appearance of the aqueous solution. |
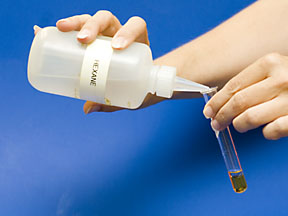 |
Now add 1 mL hexane and gently tap the bottom of the test tube to mix. Be sure it mixes; it may take a more vigorous shake, but start gently. Don’t spill, but do not put your finger over the top and shake. Record all observations of both layers. When your observations are complete, put the solutions in the labeled waste jar in the hood. Rinse the test tube and put the rinsing in the jar too. |
 |
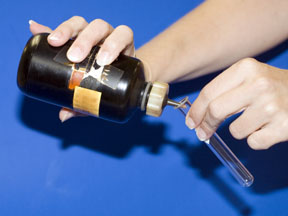
Bromine is a liquid at room temperature, and is quite volatile (that is, it evaporates easily). The aqueous solution of bromine (Br2) is under the hood. Do not take any test tube containing bromine out of the hood. When finished with the bromine solutions, pour them in the waste jar in the hood, and then rinse the test tube with water from a wash bottle. Add 1 mL of the bromine solution to a test tube. Record the appearance of the aqueous solution. Just as before, add 1 mL of hexane and mix. Record all observations. |
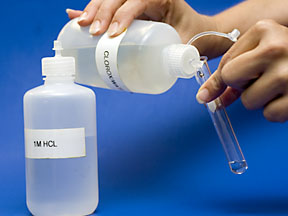 |
Cl2 is normally a gas at room temperature. Since aqueous solutions of chlorine are not stable for very long (It’s the equivalent of a soda going flat due to the loss of CO2.), each student will make a solution of chlorine (Cl2). Add 1 mL hexane to a test tube. Now add 0.5 mL Clorox and 0.5 mL 1 M HCl to the test tube. Do not breathe the bubbles that are given off–this is chlorine gas. Note the color of each layer. When finished, pour the mixture in the waste jar and rinse the test tube. |
| Part III: Electronegativity Testing | |
 |
Now that baseline observations of what each of the ions and molecules looks like in water and in hexane, this set of reactions will look at all possible combinations of two reactants. This should allow relative electronegativities of the halogens to be confirmed. Remember that you are now doing a reaction, so you must make sure that your solution layers are thoroughly mixed to make sure the reactants come in contact with each other. |
|
Add 0.5 mL Clorox to 0.5 mL 1M HCl to make Cl2(aq), and then add 1 mL hexane and mix. To this, add 1 mL of the water solution of I–. Mix well and record your observations. Dispose of the solution in the waste jar. |
|
Repeat using the water solution of Br– instead of the I–. |
|
Add 1 mL of the Br2(aq) to 1 mL hexane, mix, and then add 1 mL of the water solution of I–. Mix well and record all observations. Again, dispose of the solution in the waste jar. |
|
Repeat using the water solution of Cl– instead of the I–. |
 |
Add 1 mL of the I2(aq) to 1 mL hexane, mix, then add 1 mL of the water solution of Cl–. Record all observations. Mix well and record all observations. Again, dispose of the solution in the waste jar. |
|
Repeat for the water solution of Br– instead of the Cl–. |
